
Cover image created through Copilot
Testing APIs with OAuth 2.0 authentication can be a complex task, but Postman simplifies the process by providing built-in support for various OAuth 2.0 flows. Postman seamlessly complements OAuth 2.0 authentication, allowing developers to easily configure settings, obtain access tokens, and manage token lifecycle. In this post, we will quickly go through this process by utilizing the Postman software.
Previous readings
- 【How 2】Breaking Free! Use Docker to Create Hands-Off Interactive Broker TWS Managing Experience
- 【How 2】 Set Up Trading API Template In Python - Placing orders with Interactive Brokers
- 【How 2】 Set Up Trading API Template In Python - Connecting My Trading Strategies To Interactive Brokers
- 【How 2】 Vol. 1. How 2 get all tradable tickers in US markets
- 【How 2】 Vol. 2. How to build an automated stock trading script
Context
As most of the self-employed quant traders know, Charles Schwab acquired TD Ameritrade in 2018. Charles Schwab, as a major player among all the broker platforms, has recently released its API interface for trading using OAuth 2.0 as a means to authenticate users. As a quant trader/developer, I found that it’s quite troublesome to probe the API using OAuth 2.0 authentication as you need to manage the refresh and access token constantly. Therefore, I will quickly go through this process by using the OAuth 2.0 authorization code grant flow in this post.
What is OAuth
OAuth 2.0 is a popular web security protocol that allows an end user to grant a third-party application access to the proprietary data of a web service. The third-party application will issue the client ID and the client secret, which the end user can use to request the authorization code. The application can then use the authorization code to request an access token from the service provider. Finally, the users will be allowed to use the access token to access protected resources. There are many articles and details about OAuth 2.0 that I will not go into detail here. You can see below for the graphical reference, or see here to further understand the detail.
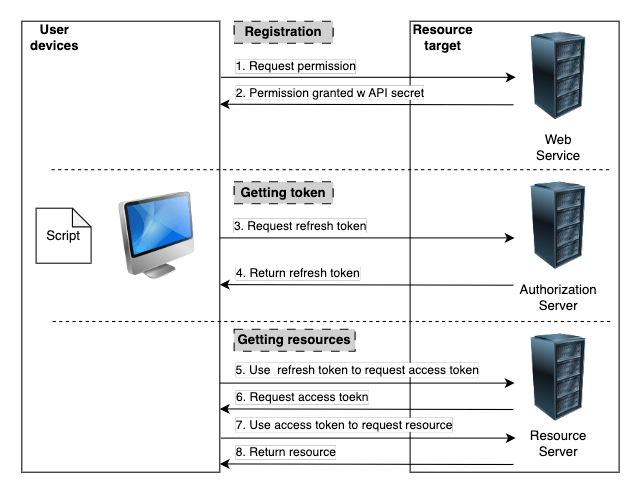
OAuth 2.0 authentication process
To access the server resources, you need to first make sure your access token is not expired. If the access token has expired, then you are required to use your refresh token to request a new access token in order to request the resource you need. The expiration time of the refresh token is usually around 7~30 days depends on the OAuth 2.0 service provider, and the expiration time of the access token is around 5 minutes (300 seconds) in industry convention. Therefore, keeping track of the state of the refresh and access tokens is very inconvenient as you need to constantly validate the state of both tokens. It’ll be efficient enough to have an automation tool to streamline the process and the test of interaction between the API and the client.
What is Postman
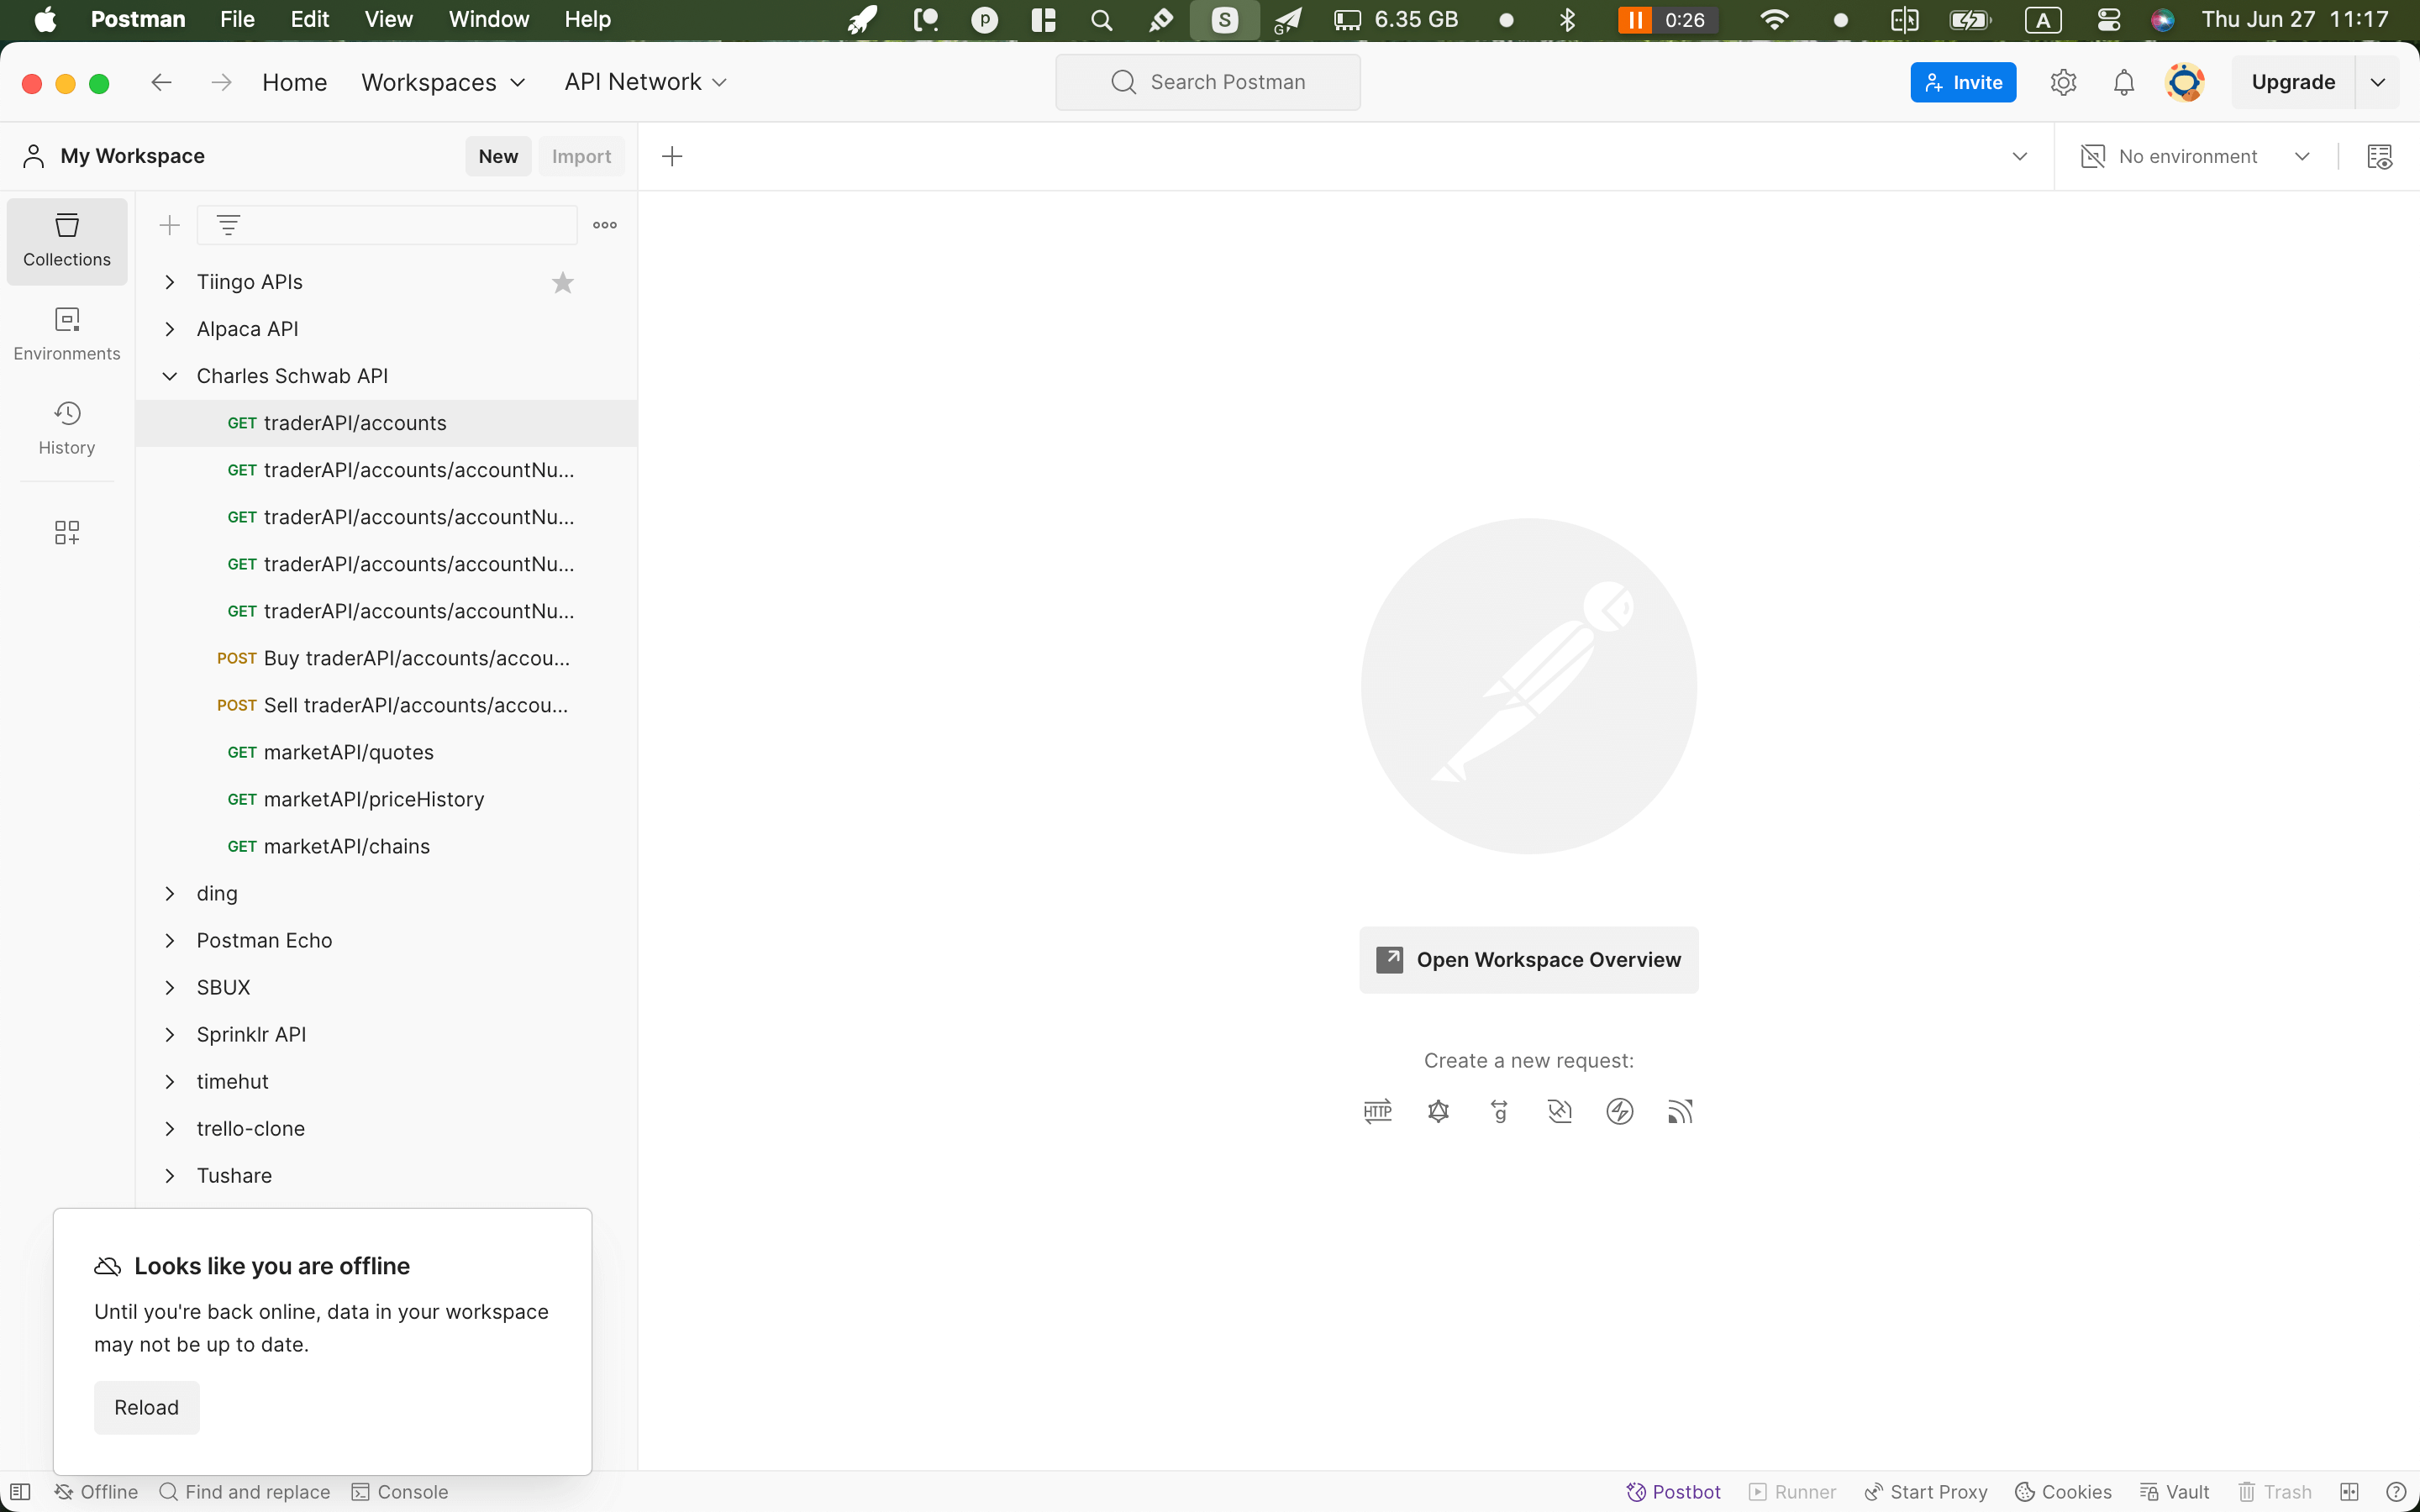
Postman software user interface
Postman is a productivity software for developers to facilitate the work of building, testing, and developing APIs. To achieve this purpose, abundant authentication methods have been integrated into the software itself. Needless to say, it includes the OAuth 2.0. In this post, we will go through the steps of enabling OAuth 2.0 capability in Postman.
Enabling OAuth 2.0 capability in Postman
1. Build an API collection
Our ultimate purpose is to create one setting to retrieve the request and refresh the token and then apply it to all APIs instead of managing the state of the token for every single API. Therefore, we need to create a collection to contain all the APIs we need to test so that we can apply the same OAuth 2.0 authentication setting to all APIs.
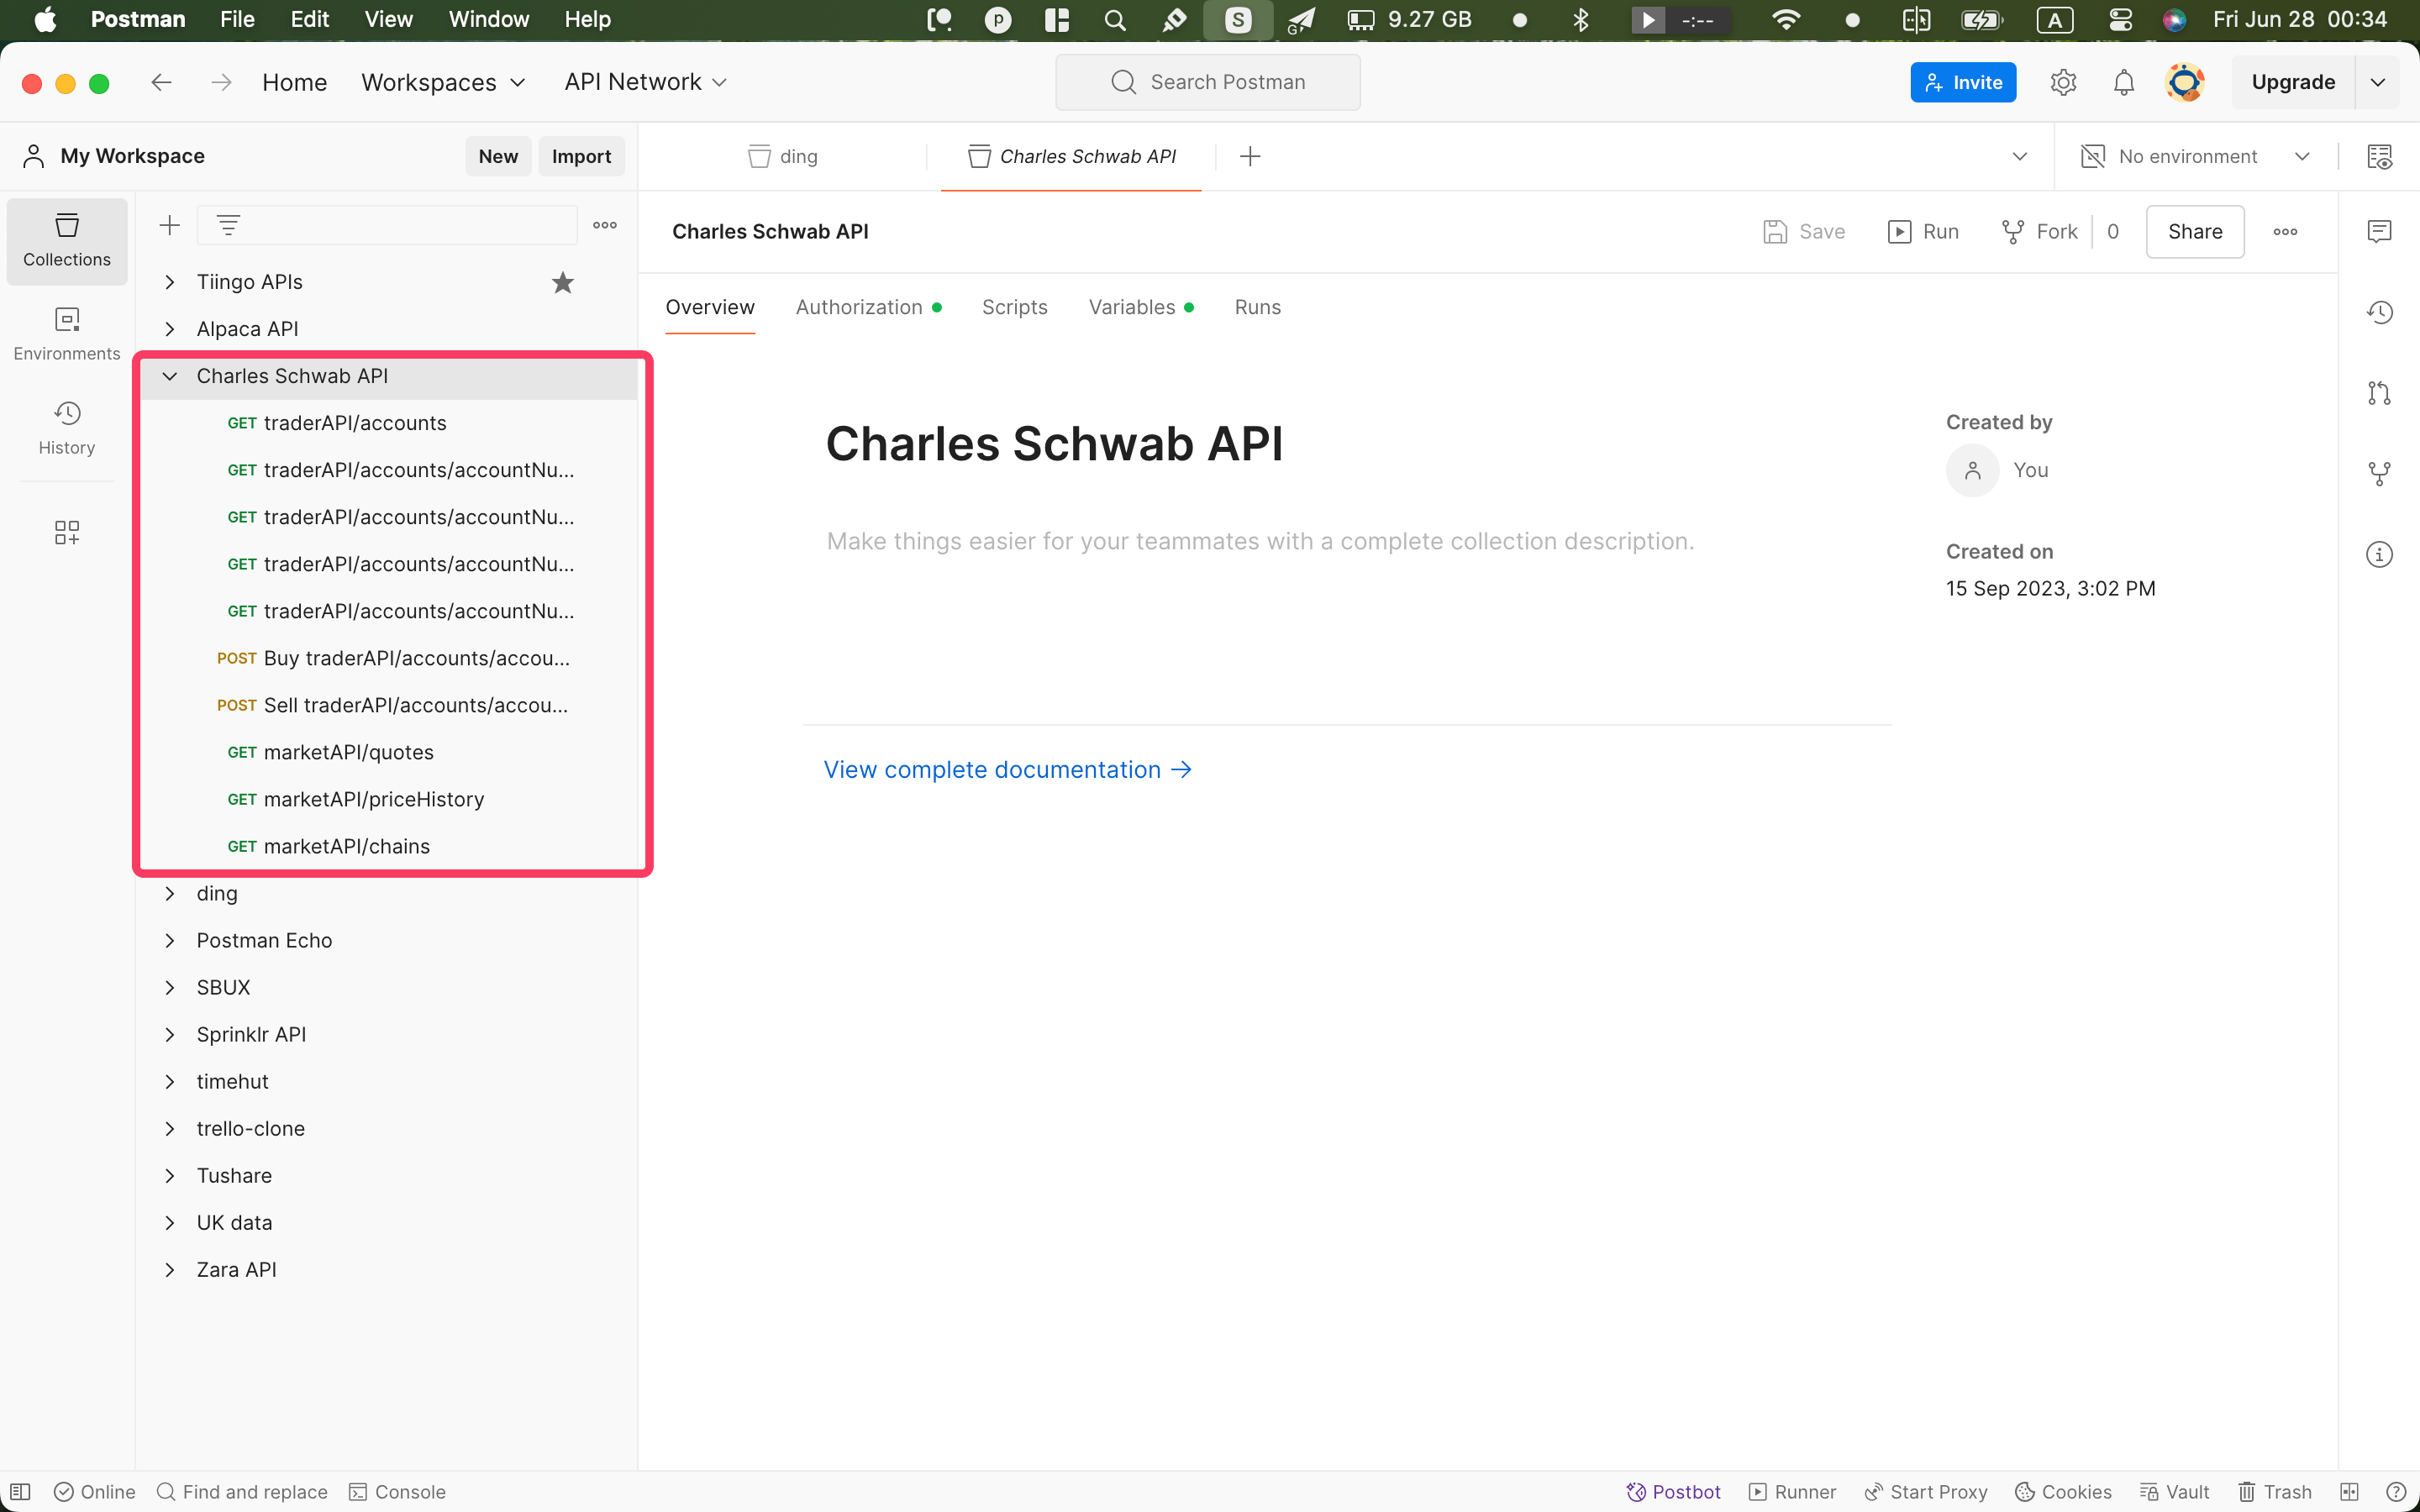
Postman software user interface - API collection
2. Set up Authorization for OAuth 2.0 for every API in the collection
Next, we need to configure the parameters for our OAuth 2.0 authentication which later will be applied to all the underlying APIs.
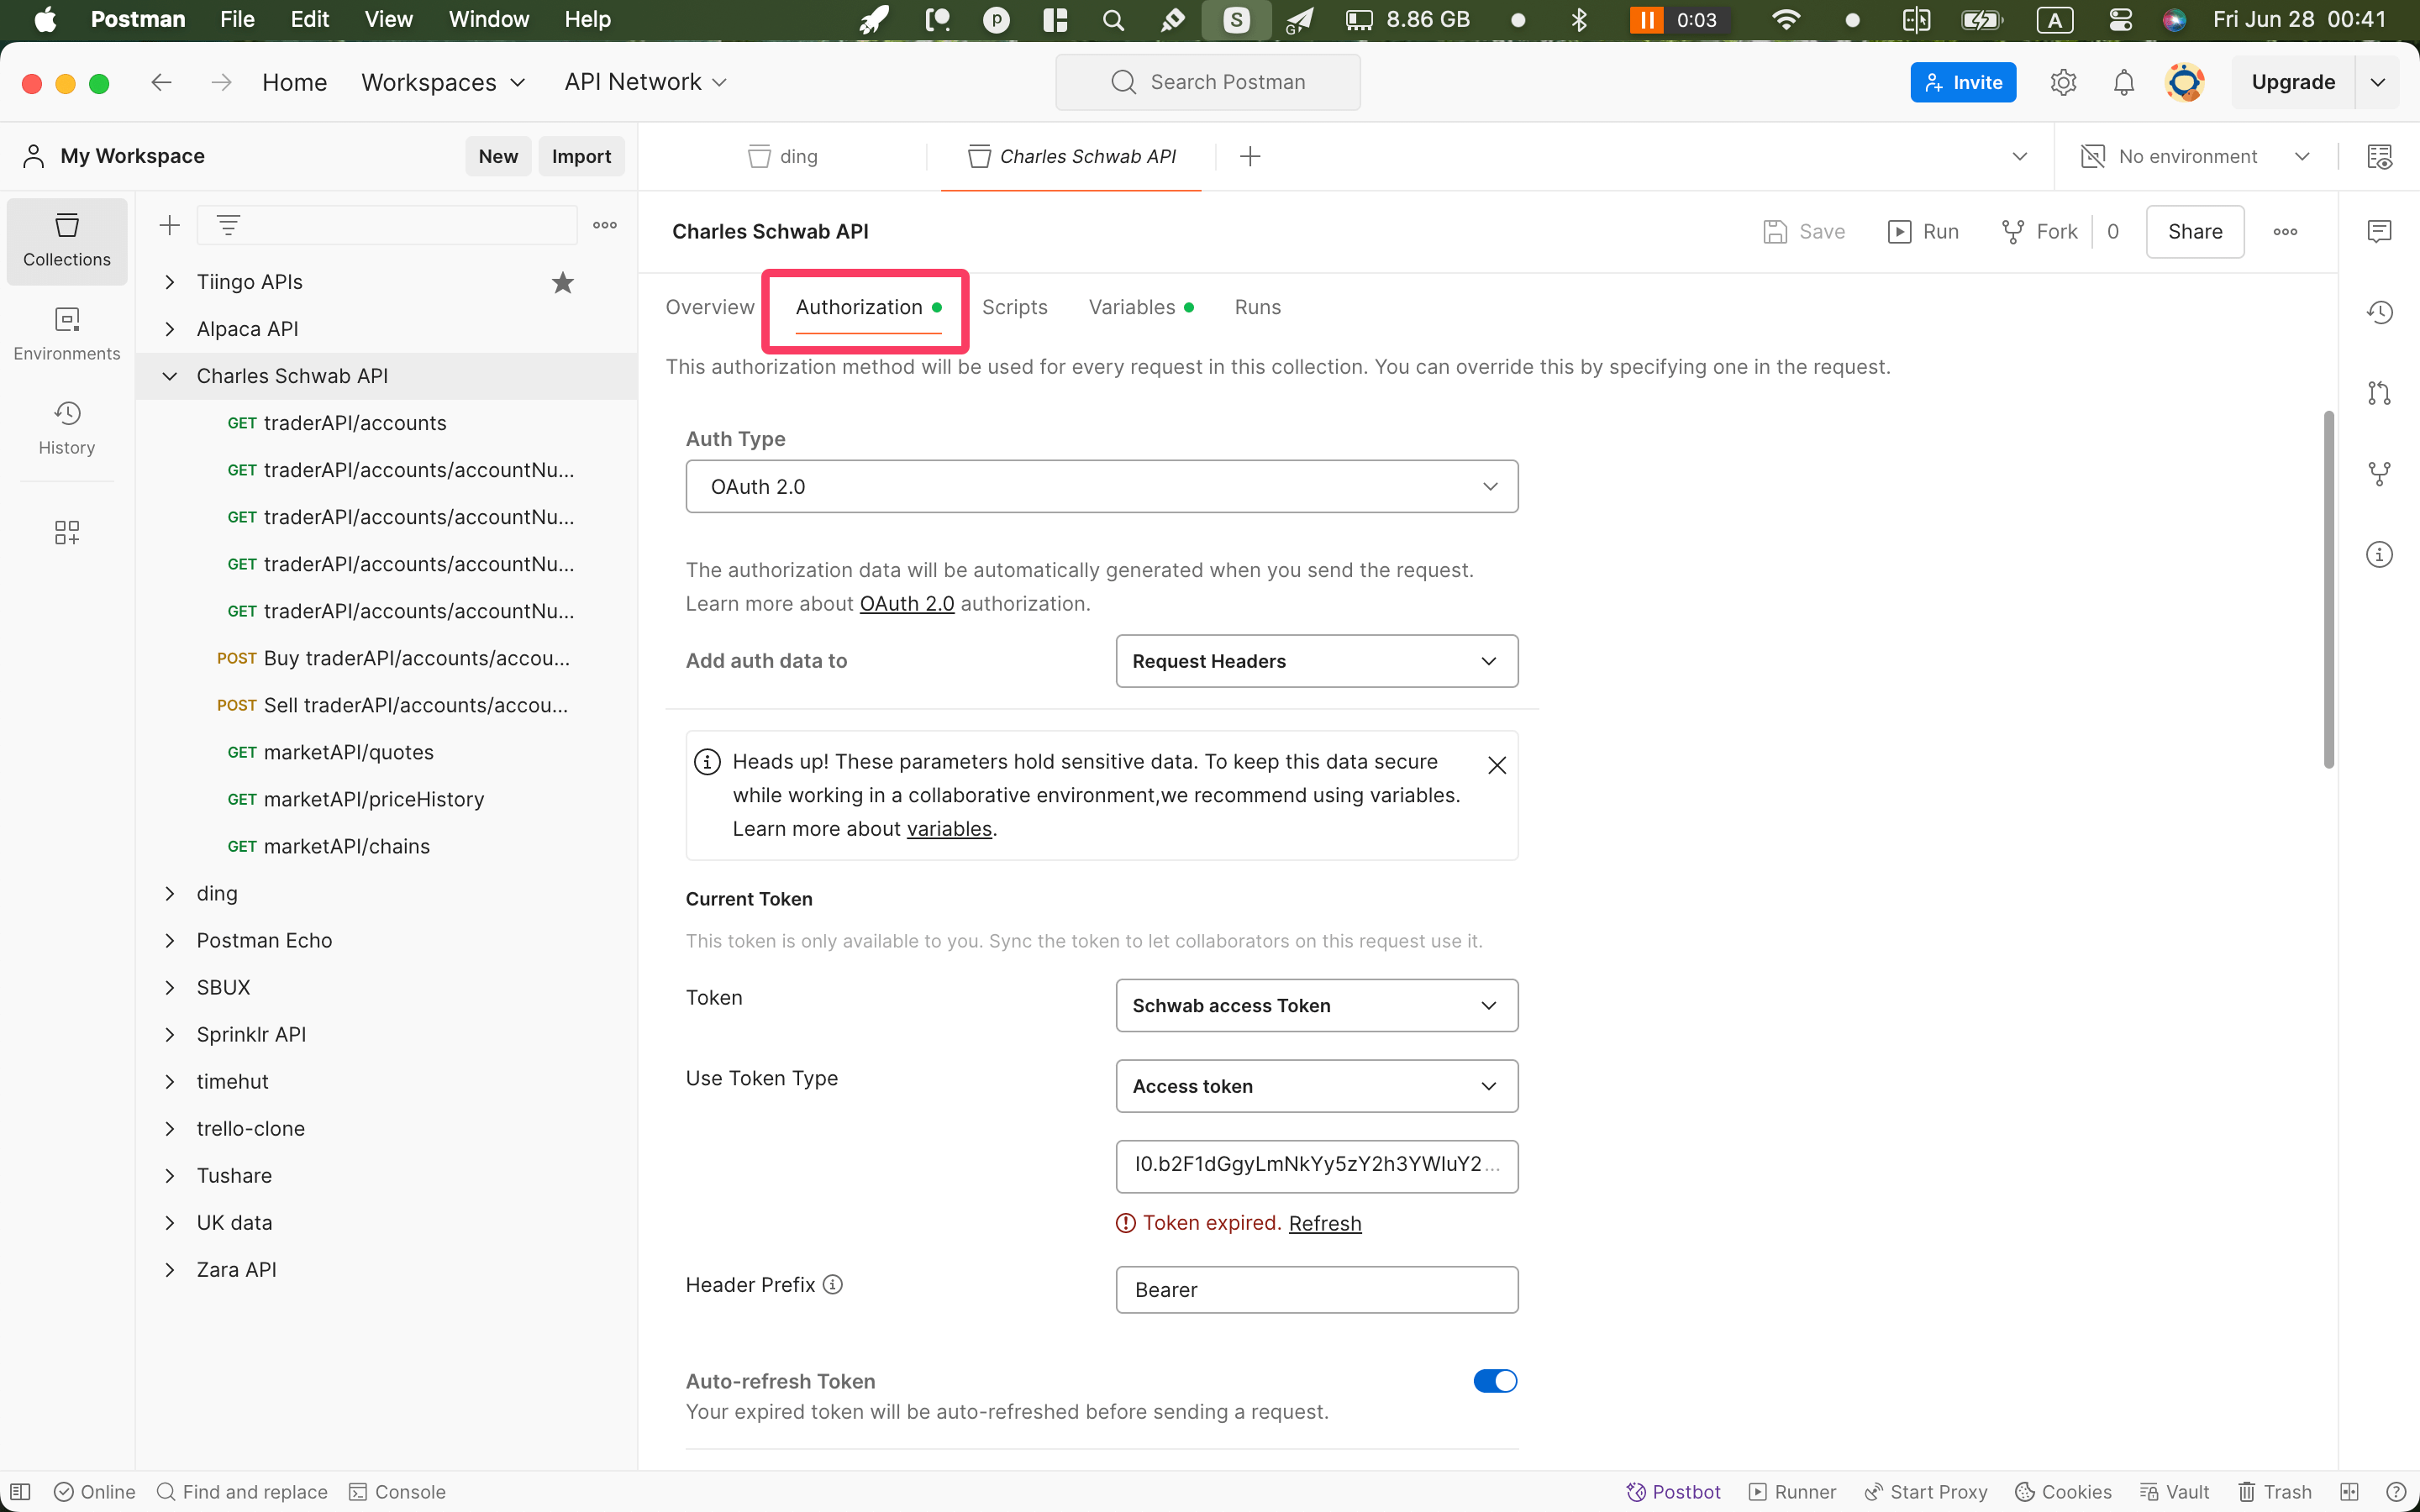
Postman software user interface - Authentication
See below for all the parameters that we need to set up:
- Auth
- Auth Type => OAuth 2.0
- Add auth data to => Request Headers
- Configure New Token
- Token Name => [Name of the token as you prefer]
- Grant type => Authorization Code
- Callback URL => https://127.0.0.1
- Auth URL => [Look it up from your service provider]
- Access Token URL => [Look it up from your service provider]
- Client ID => [Your App Key]
- Client Secret => [Your App Secret]
After you have completed the above steps, you should be able to successfully request a new access token. You can find the Get New Access Token at the bottom of the Authorization tab.
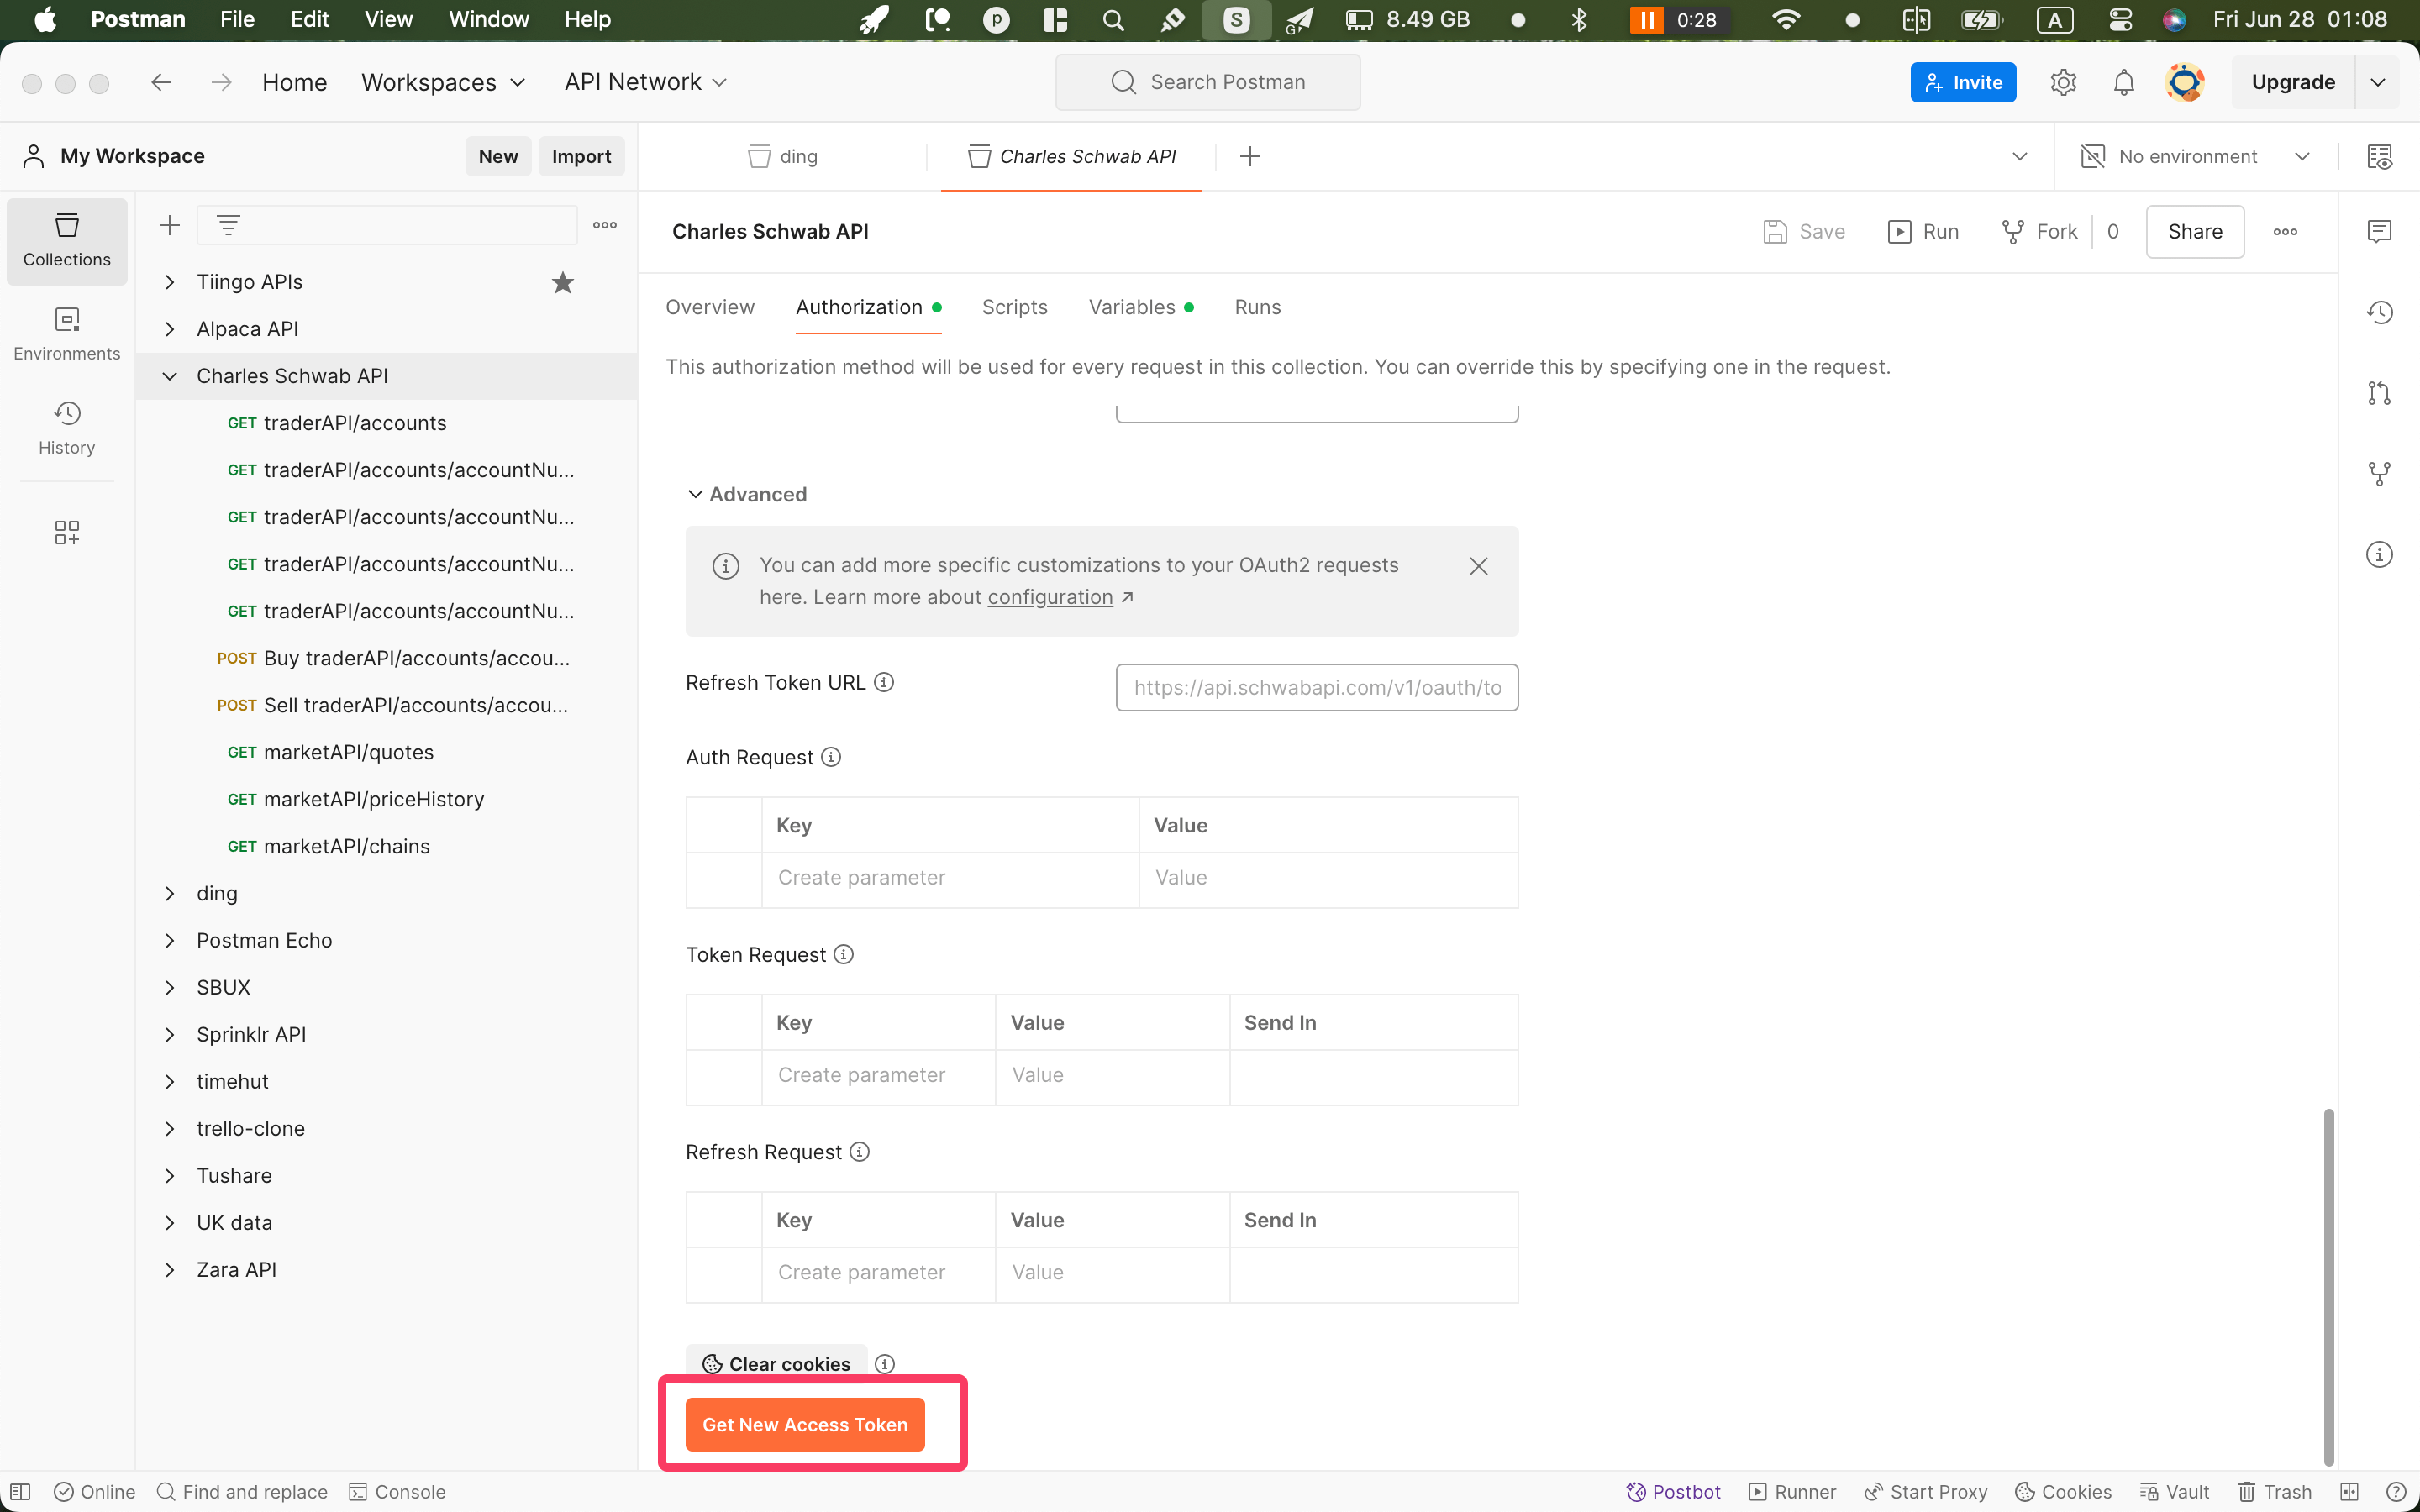
Postman software user interface - Get new access token
Once you click that button, you’ll be redirected to the OAuth login page of your service provider. After you complete the proprietary login process, the refresh token and the access token should be saved in the Postman if you have successfully walked through the login process.
3. Apply the access token for all APIs
Now let’s apply the requested access token to all the APIs under the collection we created. Create an API or pick any API that you have created under the collection you just created. In the configuration window of this picked API, you choose OAuth 2.0 as the Auth Type and choose the token that was just created as the current token under the Authentication tab.
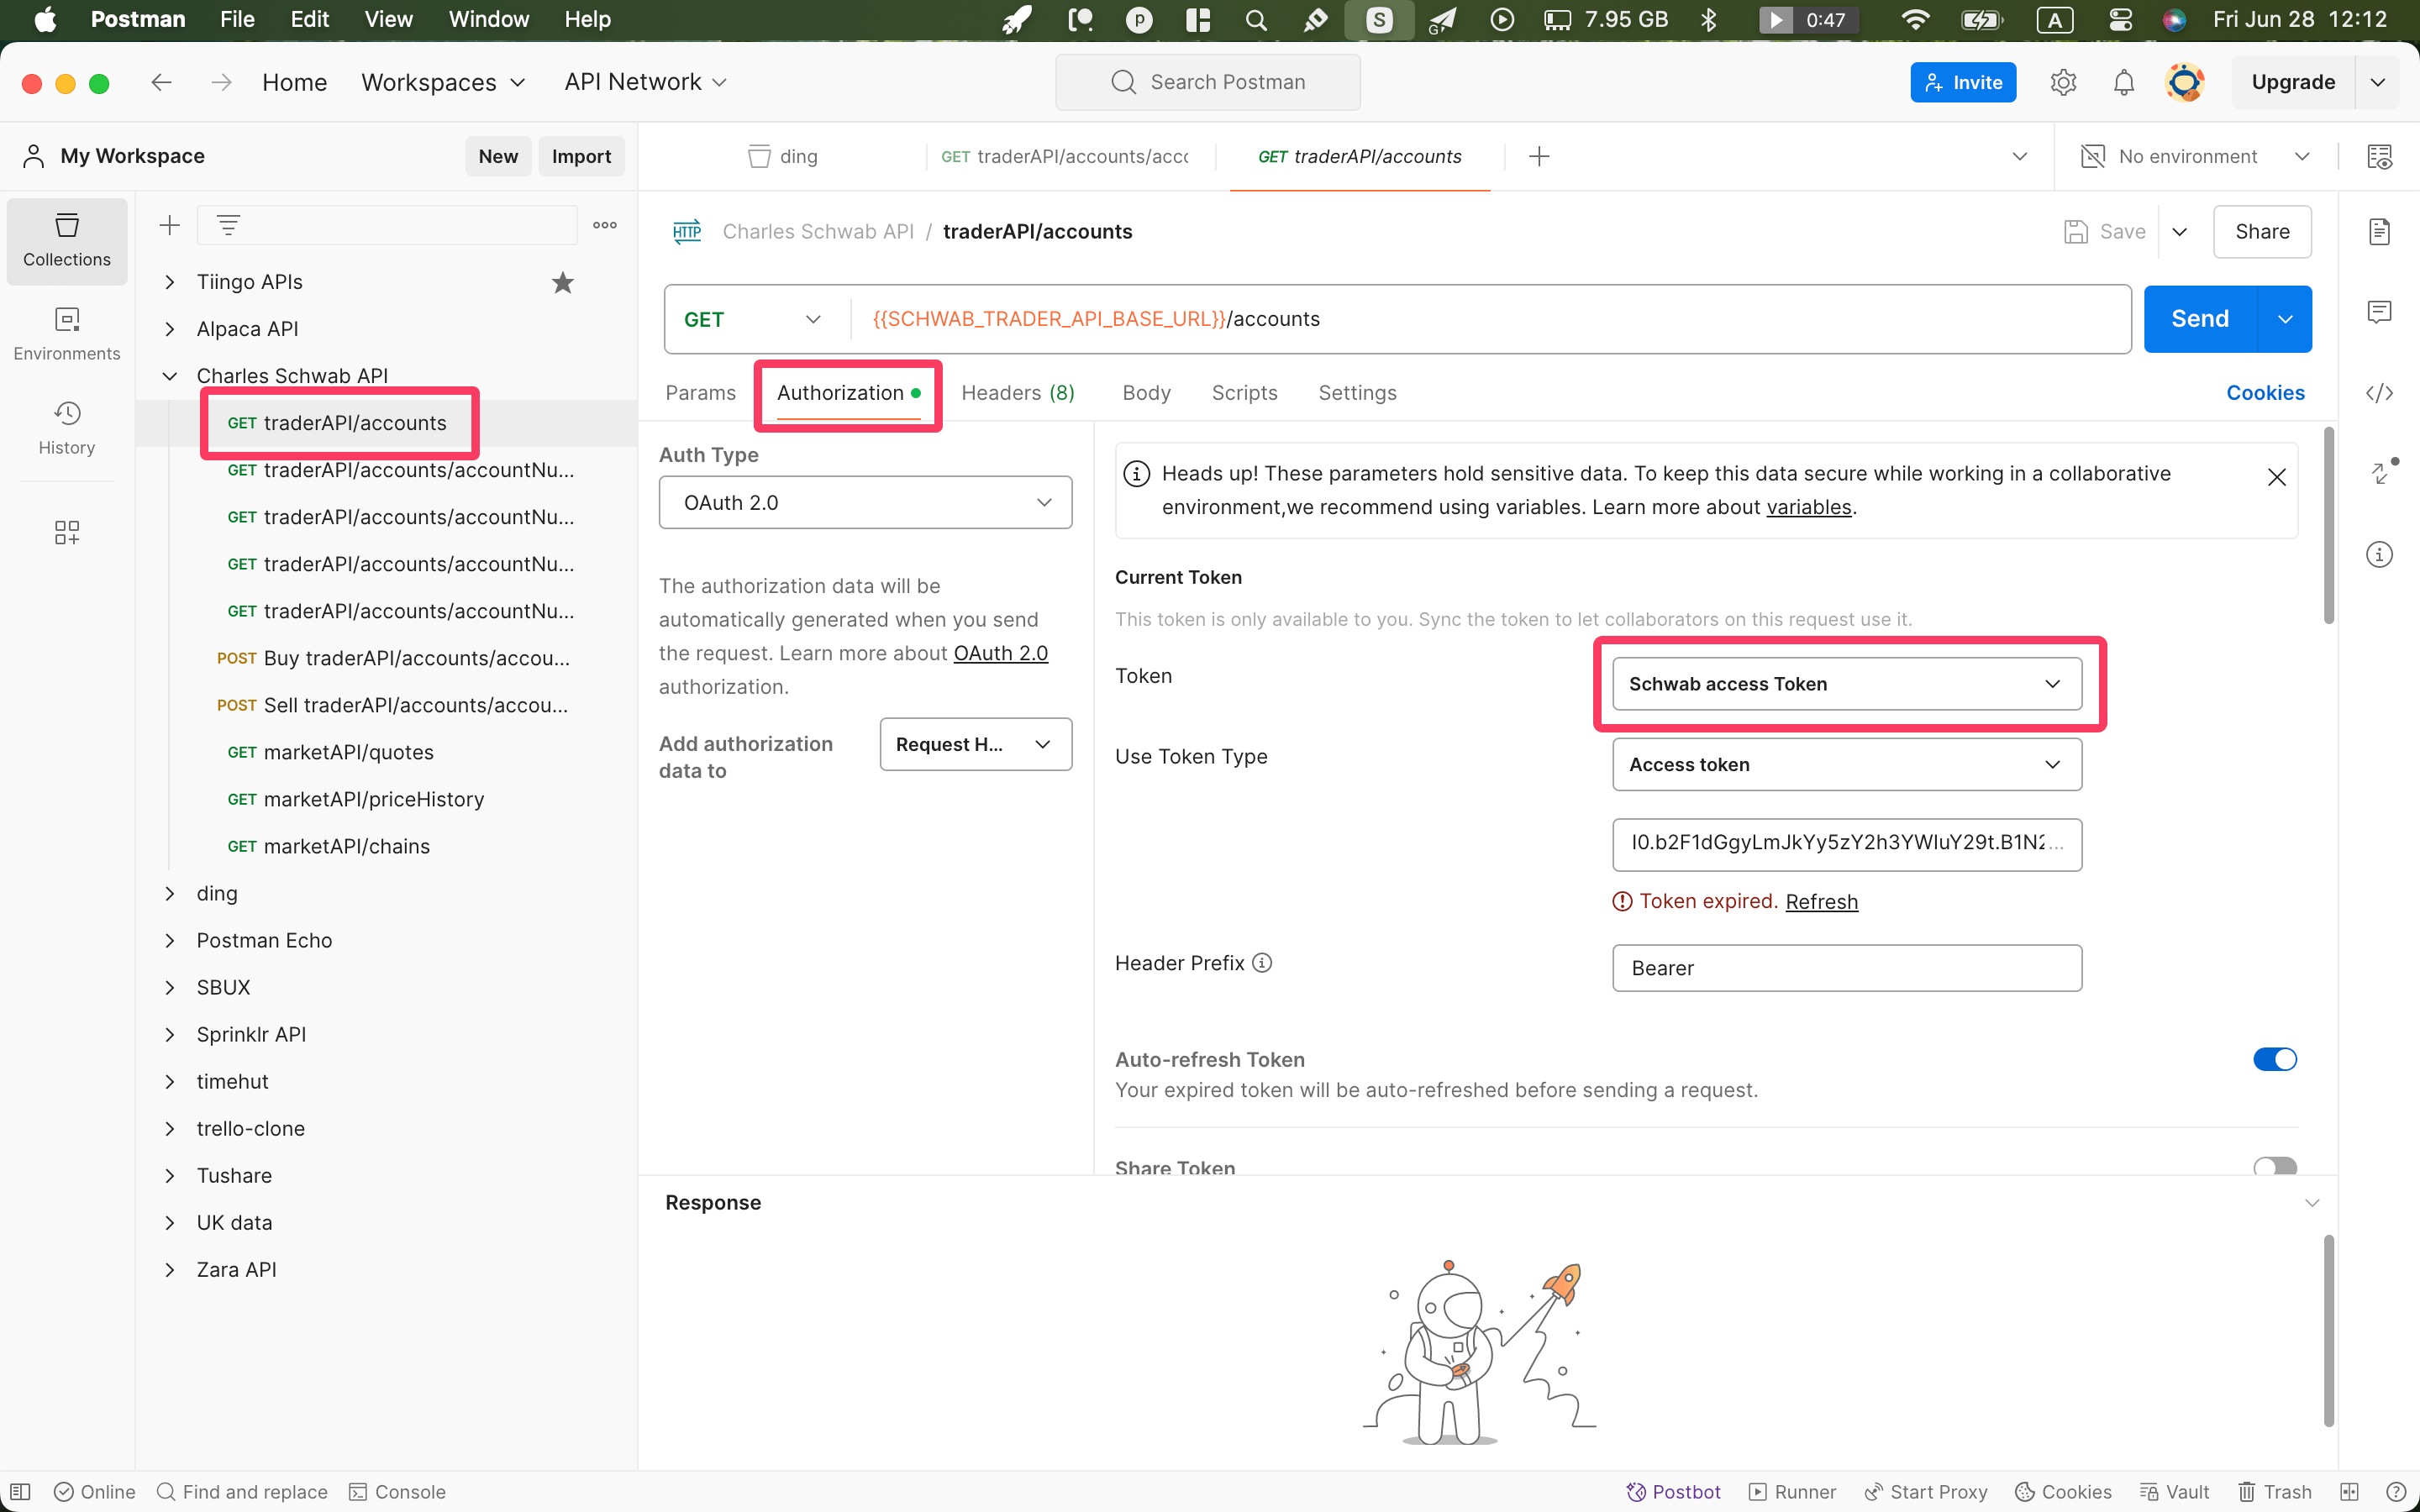
Postman software user interface - Apply access token to every API
If every step above is done correctly, you should be able to successfully request the API you have created.
4. Refresh access token for all APIs
As mentioned above, the access token expires every 5 minutes. Therefore, you’ll find that there are messages displayed below the token string as long as the access token has expired. Postman provides this tool to easily refresh the access token.
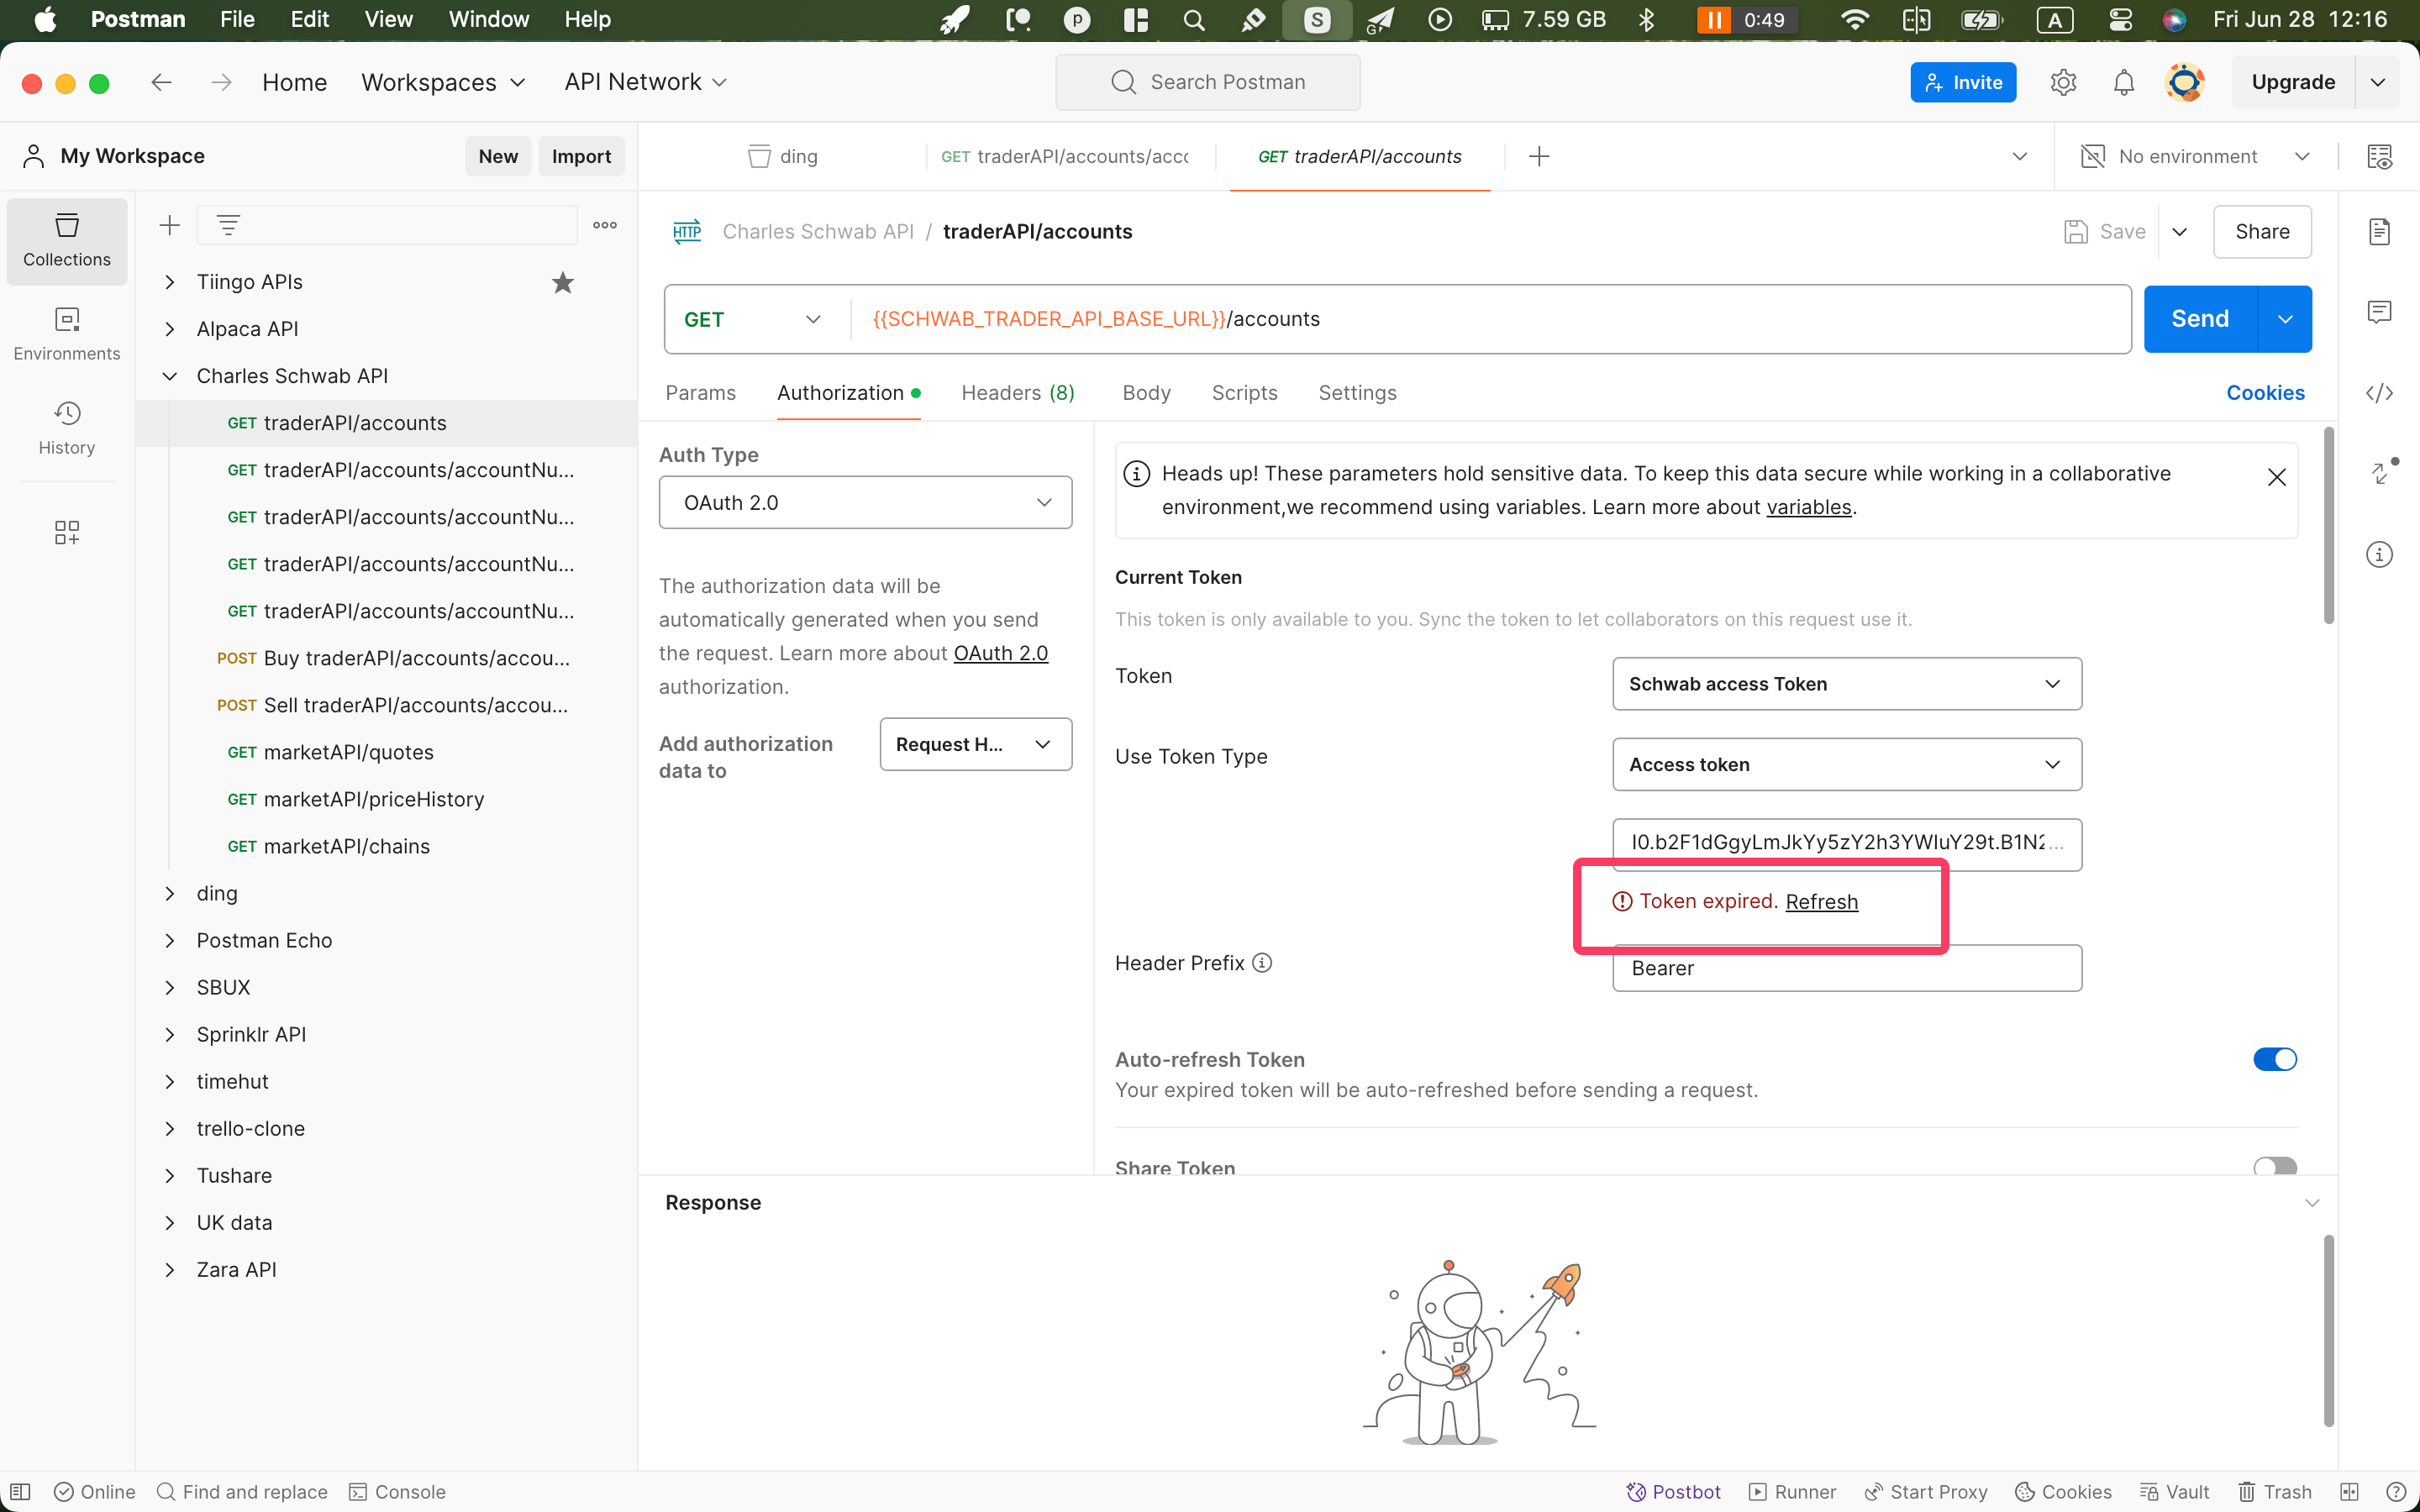
Postman software user interface - Refresh access token
Conclusion
In this post, we have gone through the steps of enabling OAuth 2.0 capability in Postman. We have also demonstrated how to apply the access token to all APIs in the collection and how to refresh the access token. Hope this post helps.
Cheers